How to Spray Paint Your Airsoft Gun: Camo Finishes Made Simple
A black rifle is the easiest thing to spot in a hedge line. A good paint job breaks up that hard, dark shape and makes your gun look like it belongs in your loadout. It is a cheap, rewarding weekend project, but there are a few things you must get right first, starting with the law.
Before you start: the UK legal bit
Important. Under the Violent Crime Reduction Act 2006, it is an offence to manufacture a realistic imitation firearm (RIF) without a valid defence. Painting a two-tone (brightly coloured) imitation in realistic colours can count as manufacturing a RIF.
If you own a two-tone and do not hold a valid defence, such as being a registered airsoft skirmisher, do not repaint the bright parts in realistic colours. Painting a gun that is already a RIF, which you bought legitimately, is fine. If in doubt, keep it two-tone and read our guide to UKARA, RIFs and two-tones.
You should also check whether painting will affect your warranty. Most manufacturers will not cover cosmetic damage, and some will not cover the gun at all once it has been painted or disassembled.
What you need
- Paint: matt or flat aerosol paint designed for plastics and metals. Specialist firearm coatings such as Krylon Camouflage, Rust-Oleum Camo or Duracoat-style finishes are ideal. Avoid gloss.
- Plastic primer if your gun has polymer parts.
- Matt clear coat to seal the finish.
- Masking tape (low-tack decorator’s tape) and a craft knife.
- Foam earplugs or cotton buds to plug the muzzle and openings.
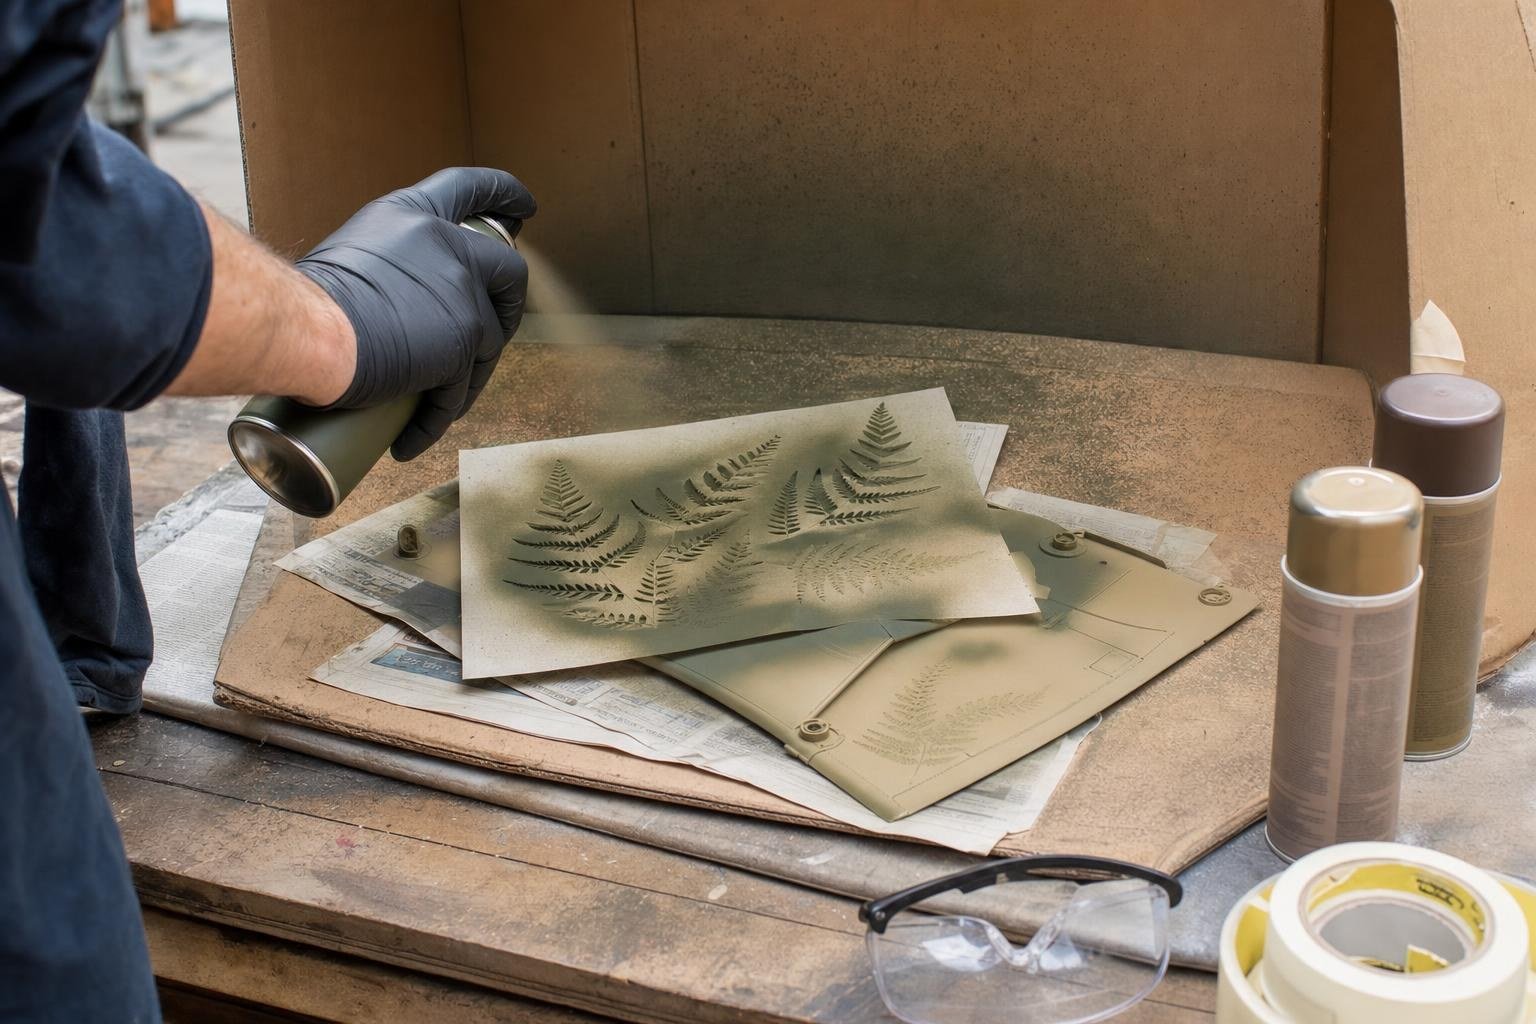
- Stencils: real leaves, ferns, garden netting, or bought camo stencils.
- Degreaser: isopropyl alcohol or a gentle washing-up liquid solution.
- Fine sandpaper or a grey scouring pad (around 400 to 600 grit).
- Protection: nitrile gloves, a respirator mask rated for paint fumes, and eye protection.
Step 1: strip it down
Remove the magazine and battery (or empty all gas) and confirm the gun is completely safe. Then remove anything you do not want painted: optics, lights, slings, rail covers, grips and the stock if it comes off easily. Paint the accessories separately if you want them to match. If you are not confident taking the gun apart, mask rather than disassemble.
Step 2: clean and key the surface
Paint will only stick to a clean, slightly rough surface. Wipe every surface with isopropyl alcohol to remove oil and silicone lubricant, which are the number one cause of peeling paint. Then lightly scuff shiny areas with fine sandpaper or a scouring pad, wipe again, and leave to dry.
Step 3: mask everything that matters
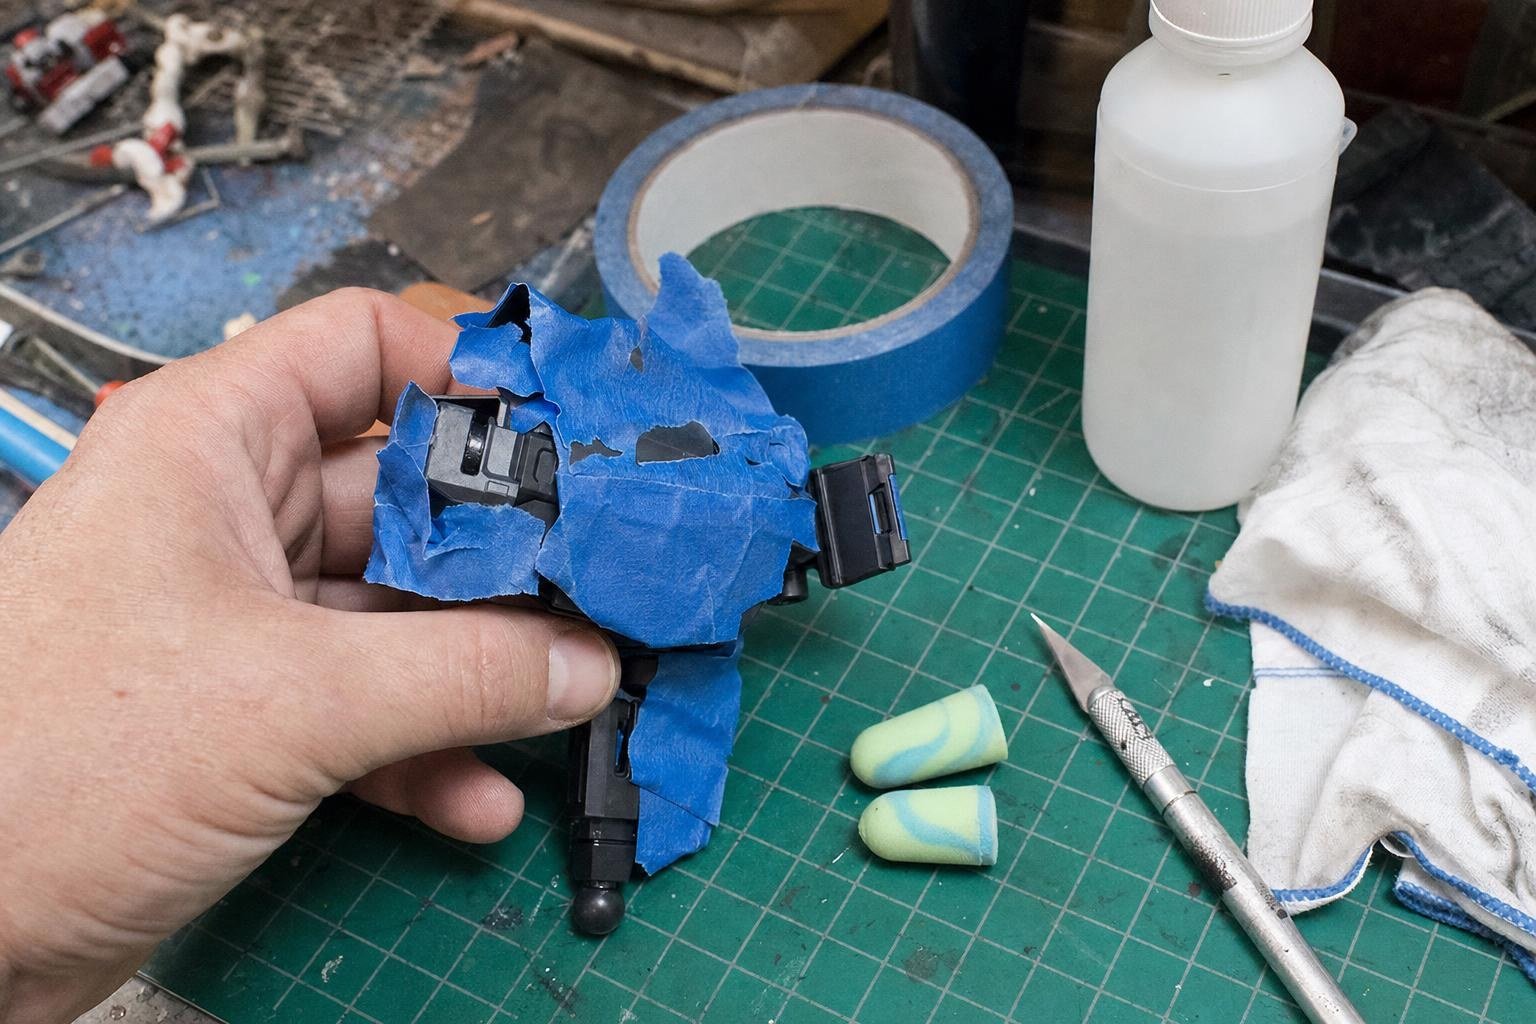
This is the step that makes or breaks the job. Paint in the wrong place can ruin a gun. Mask off:
- The muzzle and inner barrel. Plug it with a foam earplug.
- The hop-up unit and adjustment wheel, and the ejection port.
- The magazine well and magazine catch.
- The trigger, fire selector and safety. Paint can make them stiff or stop them working.
- Sights, rail tops where you mount optics, and any moving charging handle.
- Trades and markings you want to keep visible.
Hang the gun from a wire coat hanger through a sling point so you can rotate it and paint every angle without touching it.
Step 4: prime and base coat
Work outdoors on a still, dry day or in a very well ventilated space, at between 15°C and 25°C. Paint behaves badly in cold or damp air. Shake the cans for at least two minutes.
- Apply a thin coat of plastic primer from about 25cm to 30cm away, using smooth passes that start and finish off the gun.
- Leave it to flash off for 15 to 20 minutes.
- Apply your base colour, usually the lightest colour in your scheme (tan, sand or khaki). Two or three thin coats are far better than one heavy coat, which will run.
- Let the base coat dry for at least an hour before stencilling.
Step 5: create the camo pattern
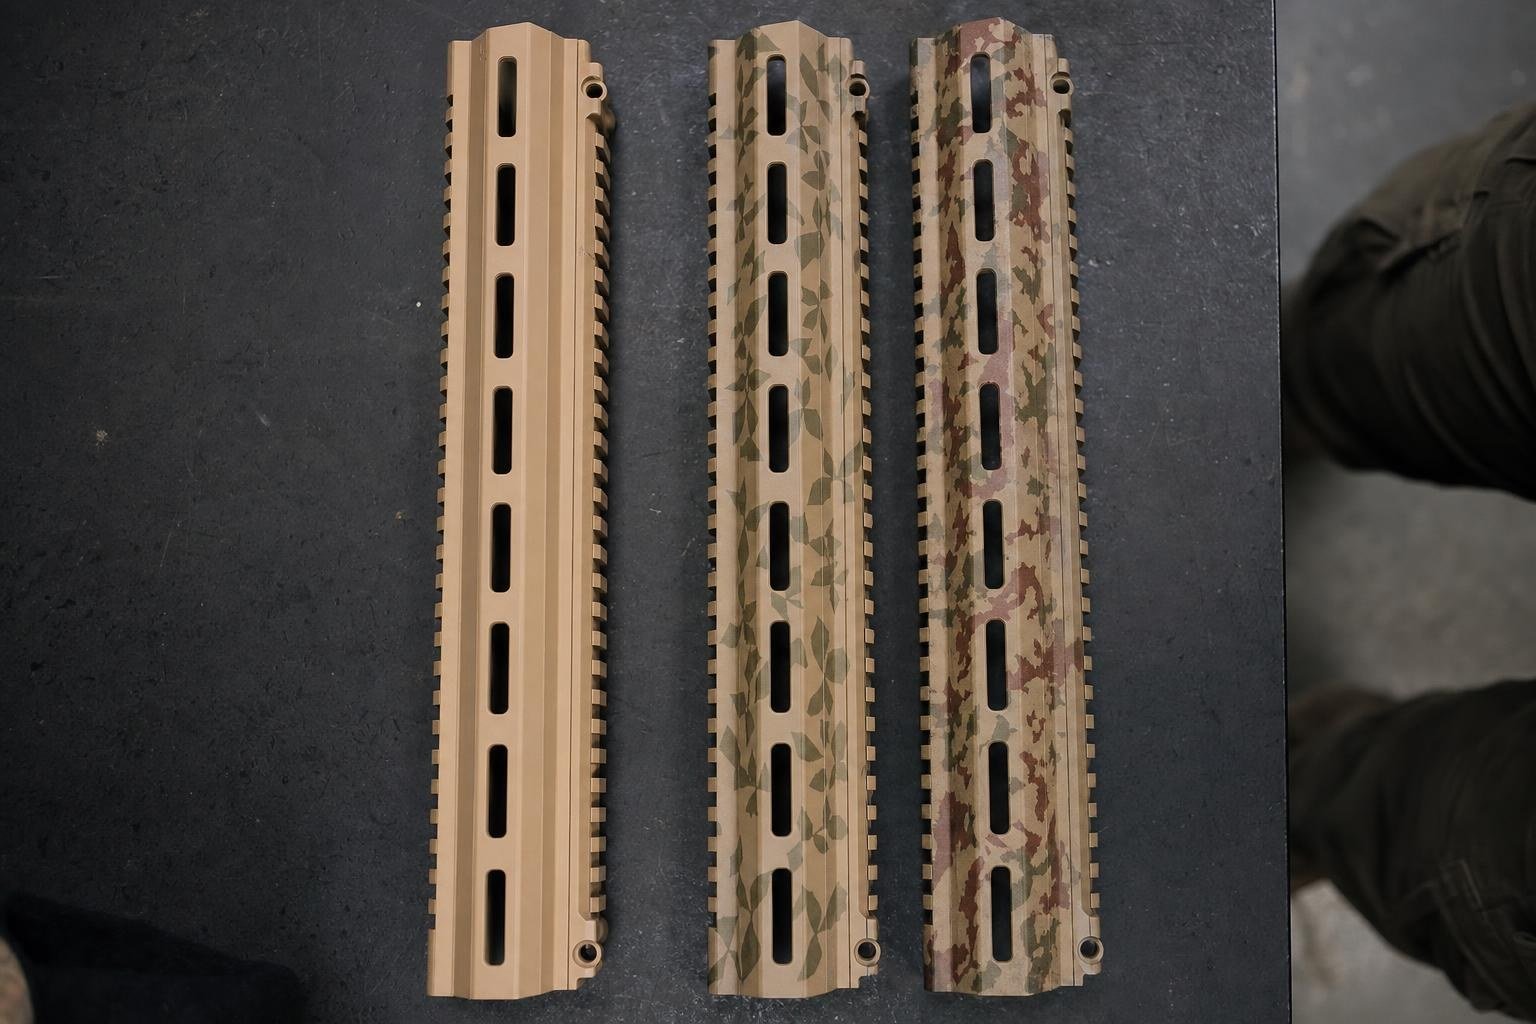
There are three popular approaches, and you can combine them.
Natural stencils (leaf and fern)
Hold real leaves, ferns or grass against the gun and spray lightly over them with your second colour, usually olive green. When you lift the leaf away, you are left with a realistic base-colour leaf shape. Repeat with a third colour such as brown. This gives a very natural woodland finish that works brilliantly in UK sites.
Netting stencil (scale pattern)
Wrap a piece of garden netting or a hairnet tightly around the gun and spray through it. The result is a fine scale-like texture that mimics patterns such as Kryptek or snakeskin. Use it sparingly over a base coat.
Tiger stripe and blotch
Tear masking tape into irregular strips or blobs, stick them on, then spray. Peel them away to reveal broken stripes. Freehand blotches sprayed from further away give a softer, airbrushed edge.
Tip: keep it subtle. Three colours are plenty, and a final very light “dusting” pass of your base colour from 40cm away softens hard edges and pulls the whole pattern together. Match your gun to your clothing too: see our guide to military camouflage patterns.
Step 6: seal it
Once the pattern has dried for a few hours, apply two thin coats of matt clear coat. It protects the paint from scratches, solvents and UV, and kills any shine. Then leave the gun to cure fully. Most aerosol paints are touch-dry in an hour but need 24 to 72 hours to harden. Do not take it to a game the next morning.
Step 7: unmask and check function
Carefully remove all the tape, cutting along painted edges with a craft knife so you do not lift paint. Remove the muzzle plug, refit your accessories, and check that the trigger, selector, magazine release, charging handle and hop-up all move freely. Test fire at a safe range or chrono before your next game day.
Common mistakes to avoid
| Mistake | Result | Fix |
|---|---|---|
| Not degreasing | Paint peels off in sheets | Clean with isopropyl alcohol first |
| Heavy coats | Runs, drips and tacky finish | Several thin coats, held 25cm to 30cm away |
| Gloss paint | Shine gives your position away | Use matt paint and a matt clear coat |
| Painting moving parts | Stiff trigger or selector | Mask thoroughly, check function after |
| Painting in the cold | Orange peel texture, poor adhesion | Paint between 15°C and 25°C |
Non-permanent alternatives
Not ready to commit? Camo tape, neoprene wraps, rifle covers and rail covers and panels in tan or olive give a similar effect and come off in seconds. They are also a great way of testing a colour scheme before you reach for the cans. Swapping black furniture for coloured external parts and attachments is another easy way to break up the outline.
Finish the look
Upgrade your setup with coloured rail covers, grips and external parts.
Shop external partsShop rail coversFrequently asked questions
Is it legal to paint an airsoft gun in the UK?
Painting a RIF you already legally own is fine. Painting a two-tone imitation in realistic colours can count as manufacturing a RIF, which is an offence without a valid defence. Keep two-tones two-tone unless you have a defence.
What paint is best for an airsoft gun?
A matt aerosol paint suitable for plastics and metals, over a plastic primer, finished with a matt clear coat. Specialist camouflage firearm paints give the best durability.
How long should paint cure before a game?
At least 24 hours, ideally 72. Paint can feel dry within an hour but stays soft and easily scratched until fully cured.
Will painting my airsoft gun void the warranty?
Often yes, or at least for cosmetic issues. Check your retailer and manufacturer warranty terms before you start.
Can I paint the magazines too?
Yes, but only the outside, and keep the feed lips, follower and catch notch clear. Paint on those parts can cause feeding problems.